Porsche Macan Forum banner

FitCamX -- OEM-Like Dash Cam w/ Clean, Easy Install

1 reading
747K views 264 replies 42 participants last post by  creekstone  
#1 ·
I have wanted a dash cam for some time, but I wasn't going to have an exposed wire running to my lighter or a long wire tucked into my trim running down to my fuse box. Then I found a DIY video (below) a fellow Macaneer posted about the $200 FitCamX and I was sold!

It looks just like OEM and gets juice from the cabin's horseshoe-light harness. I purchased and installed mine within 2 days. There is an option for a front + rear camera, but that requires much more tuck-and-stuff wiring than I care to do.

I hope this is helpful to those of you who are also sitting on the dashcam fence waiting for the right product like I was.
Image


Image


#94 ·
Welcome to the forum.

The camera has a "small" parasitic load, required for stuff like the parking shock monitor that I have not yet measured. Once measured it will be added to the topic.

The vehicle already has other parasitic loads.

The vehicle battery should be around 100Ah capacity, decreasing about 10Ah per year, end of life around 5-7 years, so the camera parasitic load would have to be high to be problematic.

My existing speculation is that is not an issue.

The parking monitor and the absence of center lamp removal requirement overrides that battery drain concern for my application.
 
#95 ·
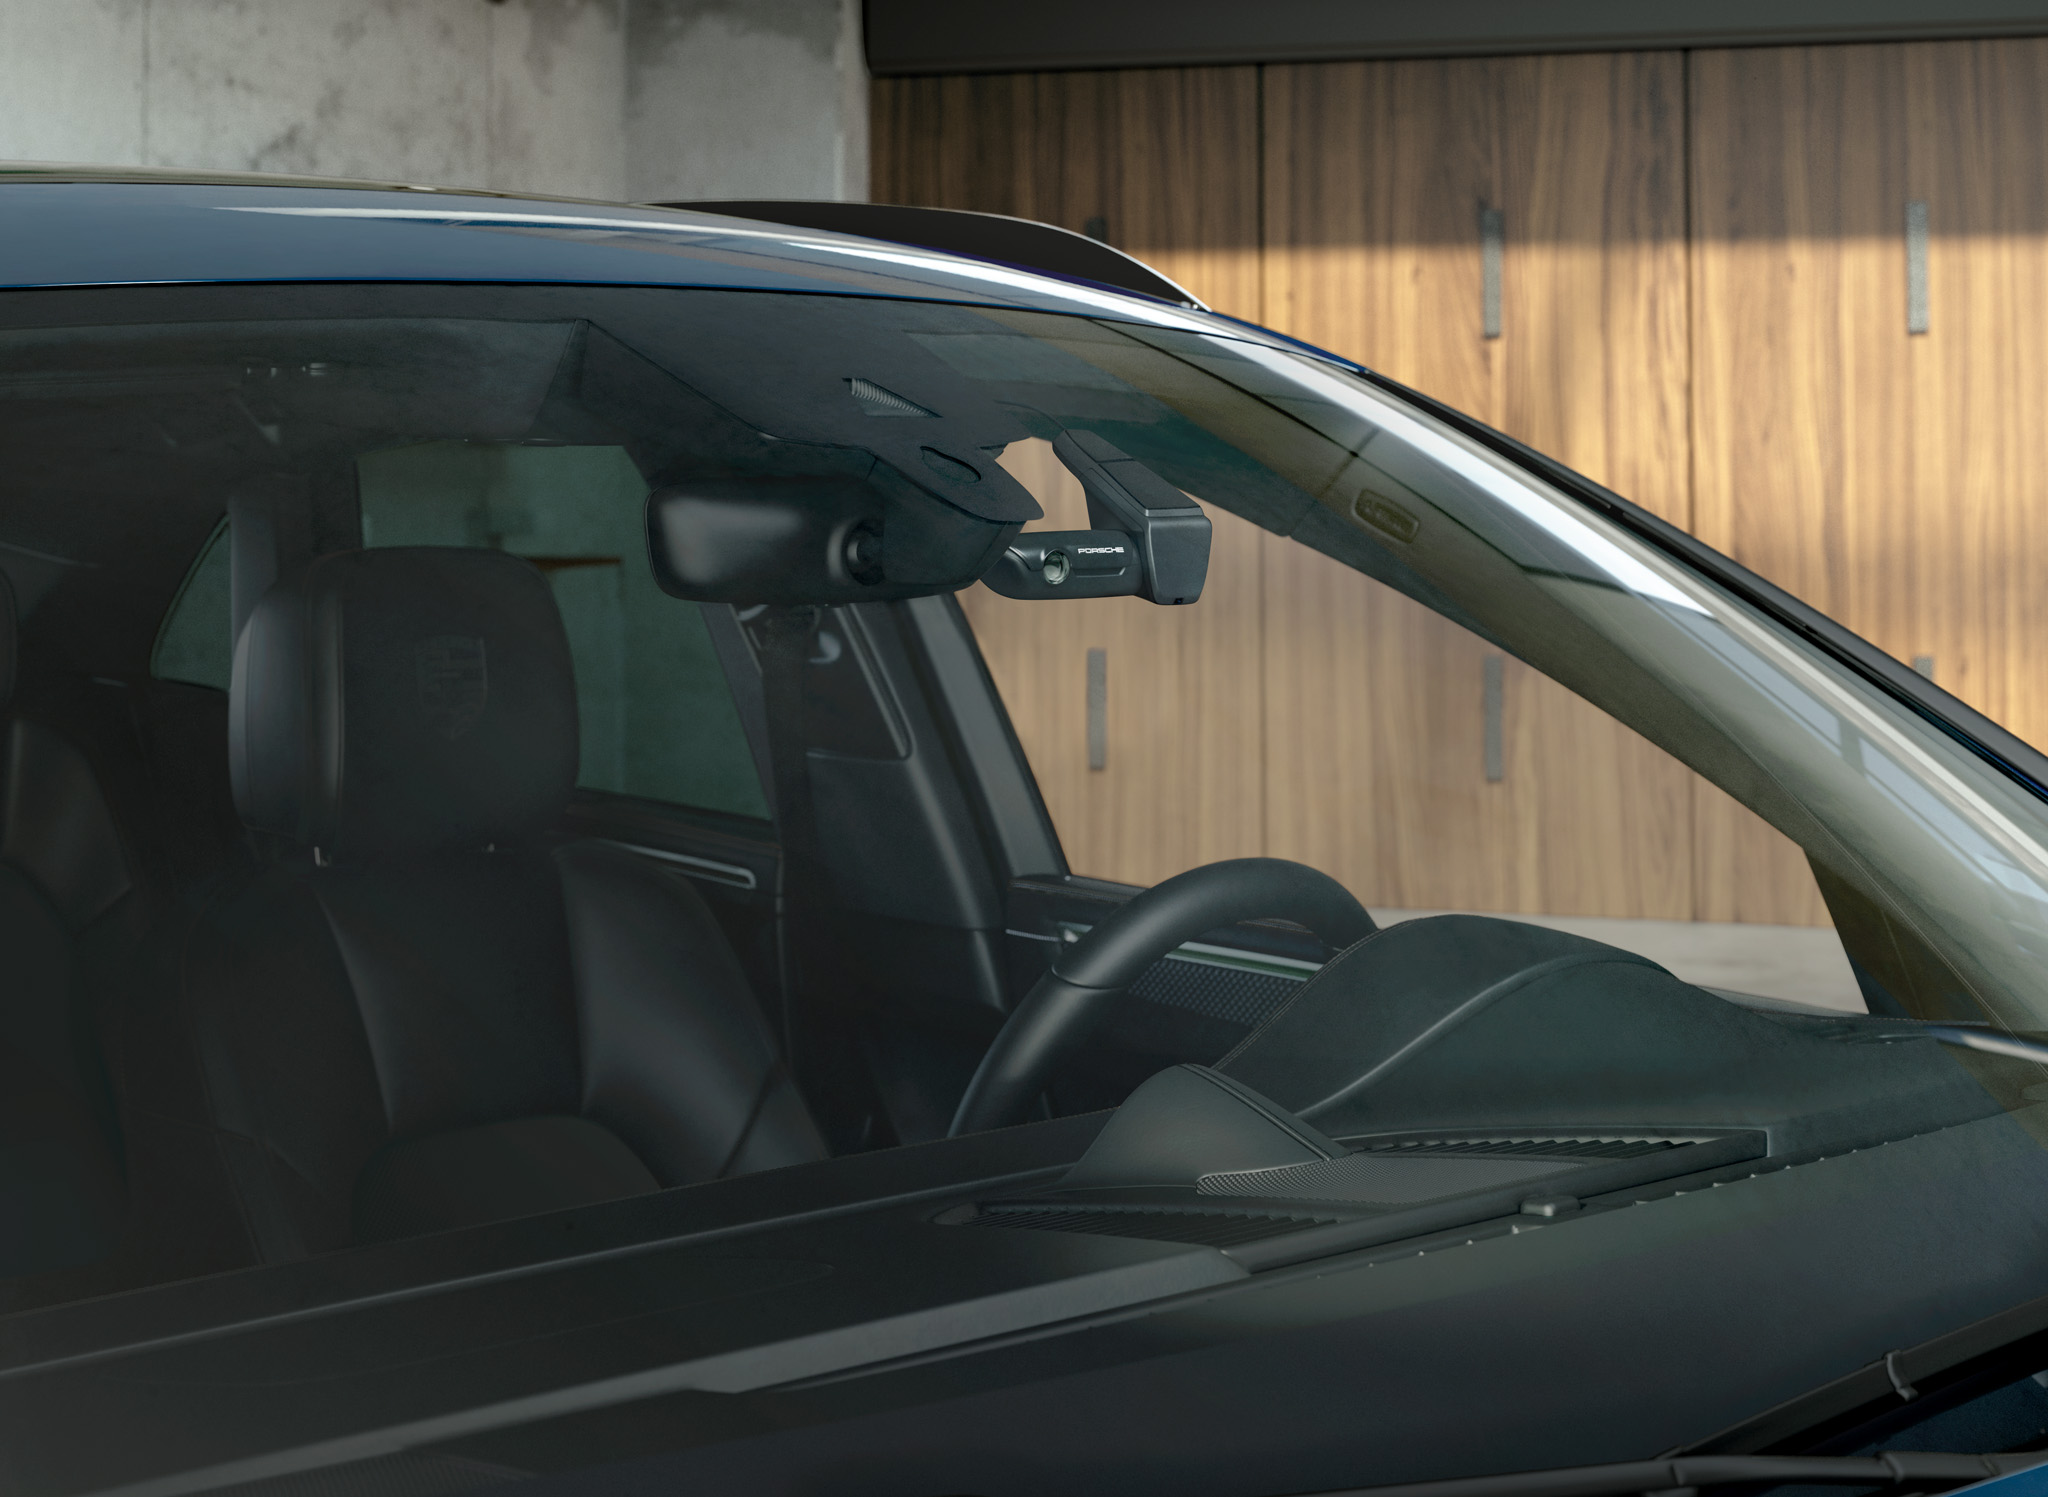
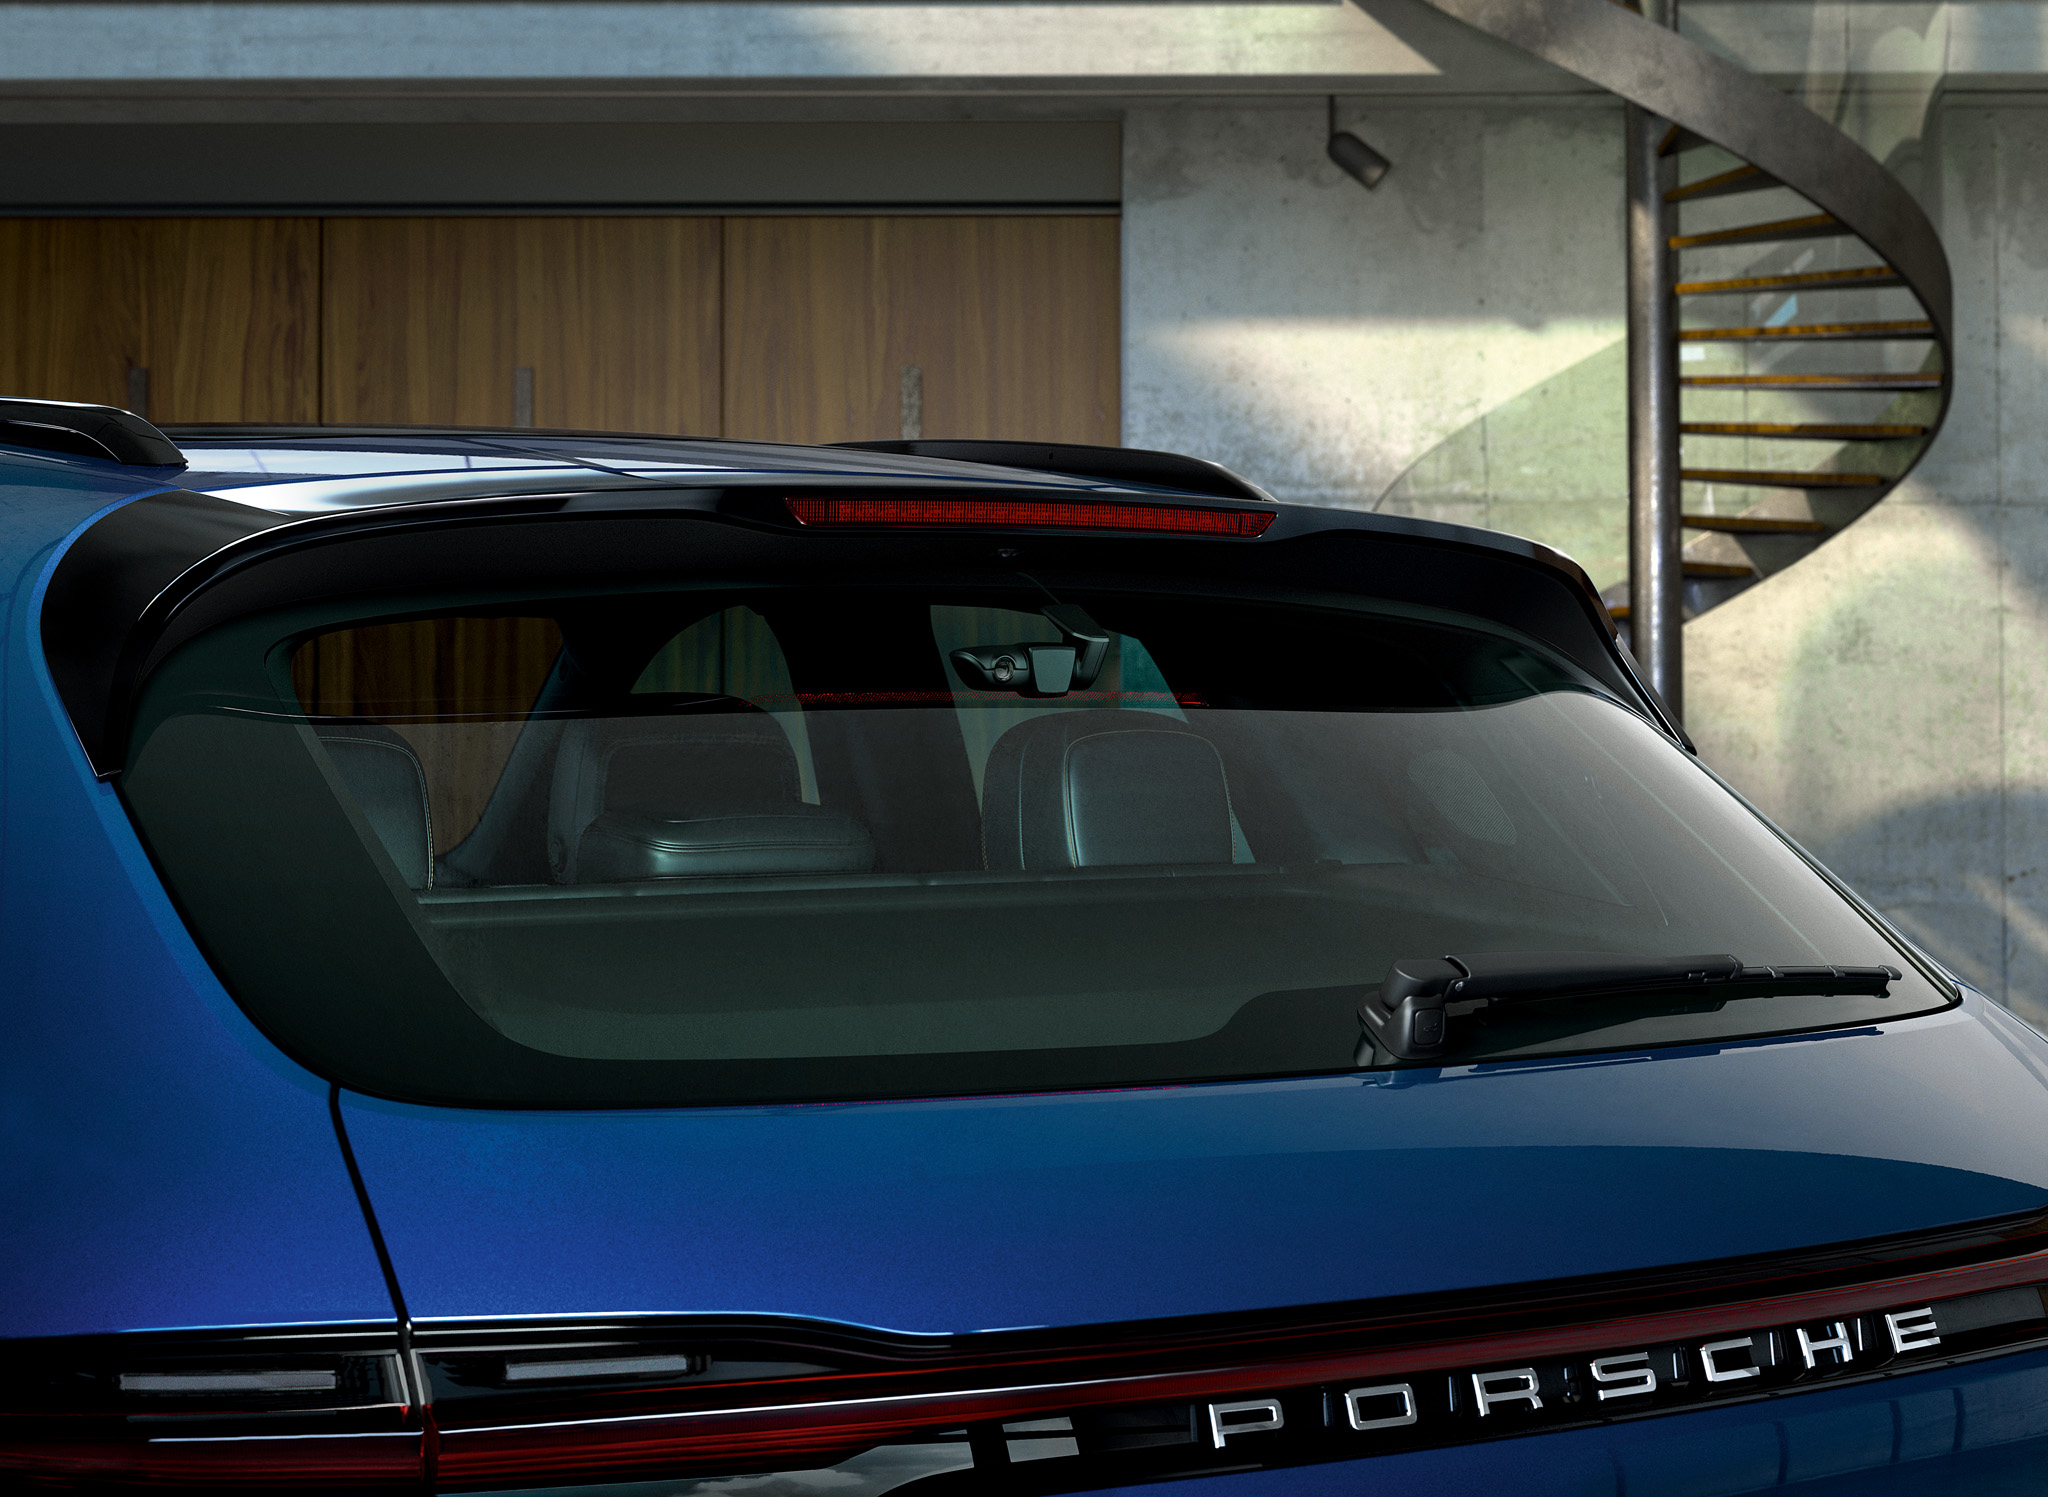
When I was installing my rear camera, I couldn't make the camera stick to the plastic trim well because of the texture so I put mine on the glass. In order to do that, I had to flip the bracket because the way the bracket is attached from the vendor prevents in from tilting the cam up enough to have a clear, entire view out the glass. If you flip the bracket, it's just enough to have the rear view fill the video frame. If I really wanted to hide the cable completely I guess I could have cut a mouse hole and have the cable out straight back but I didn't want to make any physical changes.

Also, I noticed that your front cam is tilted (just like mine was, same angle). This is because the space between the plastic housing and the windshield is very small and cables don't have enough space to clear so they are pushing down one side of the cam body when going out of it. I put a piece of black plastic shim on the other side of where the cables are going out to even it out a bit and it's better but I feel like in order to fix it for good, I have to cut an opening for the cables (which one other member mentioned that he did and I said I didn't have to do that in my previous write up, before viewing the footage, but now I know why 😅) Btw, I am OCD like that so it may not bother you 😆

Image
 
#96 ·
Also, I noticed that your front cam is tilted (just like mine was, same angle). This is because the space between the plastic housing and the windshield is very small and cables don't have enough space to clear so they are pushing down one side of the cam body when going out of it. I put a piece of black plastic shim on the other side of where the cables are going out to even it out a bit and it's better but I feel like in order to fix it for good, I have to cut an opening for the cables (which one other member mentioned that he did and I said I didn't have to do that in my previous write up, before viewing the footage, but now I know why)
Thanks for the info.

The camera shroud installation was slightly difficult due to camera cable routing.

My recollection is that my cables are positioned with one on each side.

When you say: "your front cam is tilted", how do I see that issue? When I examine the shroud and when I examine the video image I don't currently see any tilt.

Is this a right / left tilt, observed in the video image? Are there bad / good video images that could be provided showing the problem / fix?

Is this a front / rear tilt observed in a side view of the camera shroud?
 
#101 ·
I would think you can do it in 30-min to an hour the first time. If you don't feel confident that you won't bend the metal clips then order them beforehand otherwise you can't put the domelight back on. I didn't want to wait for the clips and felt somewhat confident that I could remove the light without bending the clips by blindly pushing in the clips with a trim tool before pulling the light down. I bent one of the front clips but managed to bend it back after taking it out and using the other side as a guide. There are total 4 clips, 2 front & 2 back, but if you don't swing down the back part of the light all the way (the light has a hinge in the back that let you swing down or pop up), you don't need to mess with the 2 rear clips. Just pull the front of the dome like like 30 degrees down and work, not 90 degrees. Go slowly, don't force too much. It's pretty easy to do just the front cam.
 
#110 ·
Welcome to the forum.

Yes the camera provides evidence should an accident occur.

Additionally, the Fitcamx camera w/ optional fuse panel power cord will create locked front / rear camera recordings if something happens to the parked vehicle. As an example, when I get to the drying stage on my vehicle hand washing, I snap the wipers against the windshield to flick off water. That "impact" creates secure recordings.

The intended usage is to create recordings of parking lot incidents for the unattended vehicle.

Note that parked vehicle function only exists w/ the optional cord, because the included dome light cord has power that times out shortly after turning off the vehicle.
 
#111 ·
@wingless When in parking mode, does it start recording only after a movement is detected? (I.e. no video prior to the movement?) How long do you think it can be parked before the battery goes below the level to start the car? I'm considering adding the parking mode, but the car doesn't get driven for days so I'm afraid of draining the battery (don't want to bother with a trickle charger).
 
#112 ·
This reply shows the measured dark current is less than 1mA, virtually zero, that will have absolutely no effect on a vehicle w/ a normal healthy battery, even when parked for extended duration. No trickle charger is required for the Fitcamx camera system.

WRT to parking mode, all I can think of is watching communicator usage on Star Trek Next Generation, "Pickard to bridge", after tapping their gold chest insignia. How did the communicator know to pipe that entire audio to the bridge for real time communication when "bridge" was the last word in the sentence? (The entirety of the rest of that series is completely believable and fact-based.)

The same reality applies to the parking mode. I looked at many of my parking mode videos. They appear to start about one second after impact detected. (Looked at car wash videos, using wiper slap as time zero to initiate recording.)
 
#118 · (Edited)
There have been a few weird issues w/ the vehicle since I installed the Fitcamx front / rear camera system.

The ones I have noticed most are that tapping the driver's seat heat / seat ventilation controls are sometimes ignored, requiring multiple presses to actuate. The other one I've noticed is sometimes touching the exterior handle to lock the vehicle has no effect.

The door lock was investigated and discovered to have 100% correlation to the camera system completing the existing one-minute duration recording. When the blinking camera indicator light stops, then the door lock works normally. It doesn't work properly until that light stops blinking.

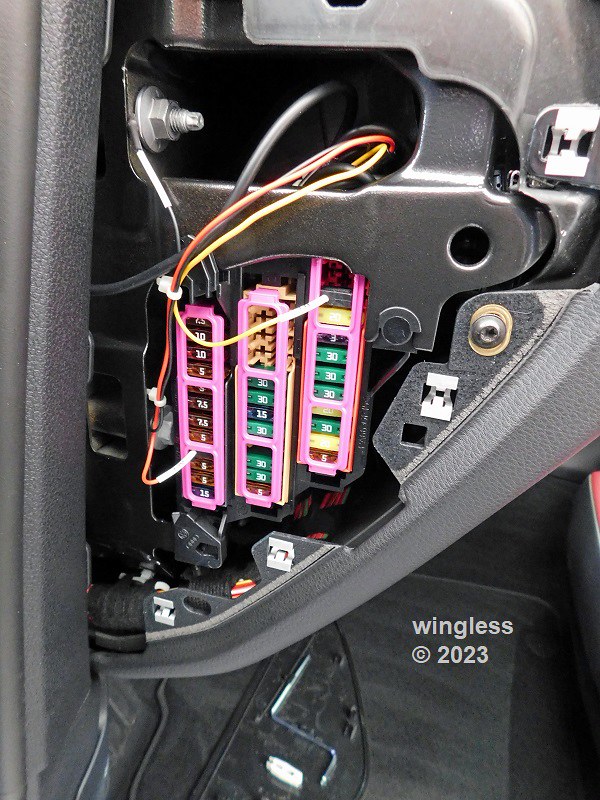
Fortunately my Fitcamx Model B 4K front / 1080P rear / 128GB camera has the optional fuse panel power cord. This optional power cord permits a VERY easy and inexpensive fix.

This five piece snap on ferrite bead set was ordered and received. Various tests were conducted. It was discovered that using three of these ferrite beads fixed the door lock problem 100% of the time. A bead was used on the red wire, yellow wire and black wire. The bead was placed on the long wire section between the inline fuse and the round black jacket. There were six five wraps (six five passes through the core center), on each wire, w/ one ferrite bead used for each wire color.

The updated wire harness tucked nicely into the side cavity above the side fuse panel, under the dash, behind the pop off fuse panel cover.

It is unknown if the problem also exists w/ the standard short dome light power cord. If the problem exists w/ that configuration it is unknown how it could be fixed. WRT to the fix, the diameter of these parts is probably too big to fit in that location. A snap on ferrite bead (different one) would likely only be able to have a single pass through the core, decreasing the effectiveness.

The manufacturer should fix this problem within the camera and should include parts / instructions to fix the problem.

It is currently unknown if these ferrite beads will fix the infrequent problem w/ the seat heater / vent switches being ignored. My guess is if that is also related to the camera then these will also either help or fix that problem. Updates will be provided later...


Edit, the initial reply incorrectly listed SIX passes through the core, but there were instead only FIVE passes through the core. Sorry for that error.

Edit, note this reply shows three additional ferrite beads that have been added to address the conducted emission problem. The totality of the solution includes both sets of ferrite beads.


Image


Image
 
#120 · (Edited)
There have been a few weird issues w/ the vehicle since I installed the Fitcamx front / rear camera system.

The ones I have noticed most are that tapping the driver's seat heat / seat ventilation controls are sometimes ignored, requiring multiple presses to actuate. The other one I've noticed is sometimes touching the exterior handle to lock the vehicle has no effect.

The door lock was investigated and discovered to have 100% correlation to the camera system completing the existing one-minute duration recording. When the blinking camera indicator light stops, then the door lock works normally. It doesn't work properly until that light stops blinking.

Fortunately my Fitcamx Model B 4K front / 1080P rear / 128GB camera has the optional fuse panel power cord. This optional power cord permits a VERY easy and inexpensive fix.

This five piece snap on ferrite bead set was ordered and received. Various tests were conducted. It was discovered that using three of these ferrite beads fixed the door lock problem 100% of the time. A bead was used on the red wire, yellow wire and black wire. The bead was placed on the long wire section between the inline fuse and the round black jacket. There were six wraps (six passes through the core center), on each wire, w/ one ferrite bead used for each wire color.

The updated wire harness tucked nicely into the side cavity above the side fuse panel, under the dash, behind the pop off fuse panel cover.

It is unknown if the problem also exists w/ the standard short dome light power cord. If the problem exists w/ that configuration it is unknown how it could be fixed. WRT to the fix, the diameter of these parts is probably too big to fit in that location. A snap on ferrite bead (different one) would likely only be able to have a single pass through the core, decreasing the effectiveness.

The manufacturer should fix this problem within the camera and should include parts / instructions to fix the problem.

It is currently unknown if these ferrite beads will fix the infrequent problem w/ the seat heater / vent switches being ignored. My guess is if that is also related to the camera then these will also either help or fix that problem. Updates will be provided later...


Image


Image
@wingless Thanks for the update! I’ve been watching a lot of dash cam install videos and have noticed the power cables used for hard wiring to the vehicle fuse box often have ferrite core rings clipped onto them. I may do the same given what you reported.

I received the FitcamX today. It only took a week to get here from Guangzhou, China. I was not expecting it to arrive so soon and won’t be able to install for another week or so. I did notice the rear dash cam didn’t look like what I’ve seen in previous photos (but it did match what was listed on the FitcamX website).


I probably will NOT attempt to run the rear dash cam cable all the way through to the hatch/trunk. I want to avoid 1) having to remove the hatch/trunk interior and 2) having to snake the cable through the rubber grommet to the hatch/trunk. I’m thinking about rigging a discreet metal clamp (or using this from Dashcam Store) onto the headliner at the rear in order to attach the cam. We’ll see if that works.
 
#119 ·
To provide a data point, I have the front and rear cam connected via the dome light power, and I have zero issue with the door lock or seat heating. As far as I can tell I don't see anything out of ordinary.

On an unrelated note, when installing the rear cam, you do NOT have to take the whole plastic panel off to snake the cable through for the rear hatch. Just pop the three clips (left, right and center) in the top edge of the plastic panel, unhook and you will have enough room to work with.
 
#124 ·
I bought this unit and have had nothing but issues. It randomly wont connect to my phone to allow downloads. I had a very slight accident and there was a 45 min block of time missing and several 10 sec videos scattered throughout the hard drive. Ive been emailing support for days and they have yet to reply even on their website chat.
I can't recommend this unit to anyone and I'm ready to move on.
 
#125 ·
I bought this unit and have had nothing but issues. It randomly wont connect to my phone to allow downloads. I had a very slight accident and there was a 45 min block of time missing and several 10 sec videos scattered throughout the hard drive. Ive been emailing support for days and they have yet to reply even on their website chat.
I can't recommend this unit to anyone and I'm ready to move on.
Welcome to the forum.

Those symptoms sound similar to my experience until I read / followed the details in the supplied User Manual.

My local connection is made using my iPhone and was also problematic until I toggled off the Cellular Data in the Settings menu, per the printed instructions.

My FitcamX camera system has both the front and rear camera and also has the optional fuse panel power cord, for monitoring while parked. The system creates four file folders for videos and images on this two camera system, one each for front and rear while driving, plus one each (front / rear) for "events" detected. The "events" folders are for impacts while driving or while parked.

The camera system has configuration settings. There is an impact sensitivity setting for driving and another for while parked. These each may be set for low / medium / high. On mine I have both set to high.

As an example, my system creates separate, consecutive one minute duration A/V dot ts files while driving the vehicle, putting them all into the Movie or the Movie_E folders for front and for rear. If an impact happens while driving then the system will instead put those files into the EMR and the EMR_E folders, also for front and for rear.

As such, things may / will get "jumbled up" when attempting to review / save important A/V files.

Being a self-affirmed troglodyte I find it MUCH easier to just yank the microSD card and put it into my Windows PC computer reader to pull the stored files from that memory card and put them onto my computer.

In the case of an accident, where some A/V files of interest may be in one folder and some in another, then I just move them to create a contiguous log.

My experience w/ both email and online chat have both been favorable, with prompt replies. I don't have experience w/ attempting communication over the weekend.
 
#130 ·
Well it seems the best way to get a response from them is by leaving negative feedback.
Received an email offering a full refund this morning after trying to get in contact with them for over a week.

Good luck to anyone else with this product. I hope it works out better for you than it did for me.
 
#132 ·
I am the OP back in November 2022 and am disappointed to see the issues some of you have had. I just entered talks with FitCamX to sell their products.

Anyone who has done business with me knows that I hold customer service and satisfaction above all else, even if I lose money resolving an issue. Based on what I have read, I will keep extra housings with that pesky tab on hand to quickly address any issues.

If anyone has any additional suggestions as to how I can avoid or quickly address the problems you have experienced, please let me know. Thanks!
 
#133 ·
Basic question.. Does anyone have a FitCam that is installed to the room light and is working well ??
I have the FitCam sitting to be installed..
I was going to get my audio guy to do it, but he quoted me 3 to 4 hours, for the room lite option, so clearly he is not interested..
so before I install it myself, I want to have some expectation that it will work ??
Thoughts ?
 
#134 ·
Basic question.. Does anyone have a FitCam that is installed to the room light and is working well ??
I have the FitCam sitting to be installed..
I was going to get my audio guy to do it, but he quoted me 3 to 4 hours, for the room lite option, so clearly he is not interested..
so before I install it myself, I want to have some expectation that it will work ??
Thoughts ?
Watch the DIY video I posted at the beginning of this thread. It took me about an hour, much of which was spent trying not to break any clips.
 
#136 ·
yes, I have , that is in my wheelhouse of ability..
The question I have .. is - does any one have this up and running well from the room light connection ??
Assuming room light = dome light (horseshoe shaped), yes, it's very easy to do once you take the dome light apart, which is the hard part just because the clips get bent when trying to pull the light down. I managed to bend only one and re-bent it back to shape so no need for new clips. Connecting the power wire is easy enough. I would say 1 hour is enough to get this done (if doing only thr front cam). No issues with interferences either.
 
#137 · (Edited)
FitcamX sent me 2 replacement units of the plastic housing. I removed the electronics from the dash cam with the broken tab and installed them onto the new housing.

I completed the install of both front and rear dash cams and hard wired it per the instructions provided by @wingless. The dash cams are powering on and am seeing the videos/photos in the mobile app.

So far so good but will keep an eye out for any door lock or heated seat issues or video issues. Once I’m satisfied that the dash cams are working properly, I’ll be sending back the replacement unit that also had broken tab.
 
#138 ·
I completed the install of both front and rear dash cams and hard wired it per the instructions provided by @wingless. The dash cams are powering on and am seeing the videos/photos in the mobile app.
Great news on the intact housing and installation. Can an image of the installed new style rear camera be provided?

Has the fuse panel ferrite bead solution been added?
 
#143 ·
@wingless observed issues with locking the vehicle and the heated seats not activating properly upon installation of the dash cam using the fuse box cable/hardwiring kit. It was speculated that the cable was releasing electromagnetic noise that interfered with normal operation. The ferrite core blocks/suppresses/absorbs the noise and this solution worked for him. I heeded his advice and did the same to mitigate any issues as I didn't want to make more changes after installation.

This doesn't appear to be an issue if powering the FitcamX via the overhead/dome lights.
 
#145 · (Edited)
It’s been a few days and glad to report that the dash cams (front and rear) are working properly. I’m able to see it record (the blinking blue and red light on the left side of the front dash cam) and have been able to access the videos from the mobile app.

The haptic center console has no delays when pressing the function buttons and the car is locking. The only item that is amiss is that the locking sound when arming the alarm doesn’t always sound.

I added a few more ferrite core clamps to the hardwired cable to the fuse box and it has rectified the locking sound issue.

I’ll continue to monitor and will report back if anything else pops up.
 
#148 ·
I was considering this CAM, but considering the amount of EMI/RF shielding/suppression you guys are needing, and nice job by the way, I am out.
Worried about potential issues down the road, interference. If I was the manufacturer and saw this thread.....oh man......someone would be in trouble.
 
#149 ·
Already sent the manufacturer my ferrite bead fix for the optional fuse panel direct wire kit, not required for the standard dome lamp wire kit.

My long-term engineering experience on this type of stuff is the problem is Boolean, either a problem, or not.

This elevated RF noise is stopped by the ferrite beads. A "common" problem and VERY typical solution.

The fuse panel camera system with the low-cost ferrite bead fix is no more likely than any other aftermarket modification to cause a "down the road" issue.

Please share when you've selected / installed an alternative camera solution.

Note, I still have zero reservations recommending this system, providing operational and parked front / rear A/V coverage.
 
#150 ·
Hey that’s great it’s working for you.
I do love the form of the camera, the rear is ok as well.

It’s too bad for me, that much “noise” injected in to the central fusing area, is not comfortable for me. Something is not right that it requires that much suppression.

Will revisit this option if the manufacturer make a revision…..my search continues.
 
#151 · (Edited)
If you power the dash cam from the overhead/dome light, it should be fine. You won’t need to use the ferrite cores.

UPDATE 4/14/2023: The statement above is NOT accurate. Scoresman had an issue and used ferrite cores even though he powered his dashcam via the overhead/dome light.

But if you’re looking to hardwire it to the fuse box, the ferrite cores will be needed.

There is also the option of using the OBD cable for power. That might avoid the RF issues with the fuse box.


Sent from my iPhone using Tapatalk
 
#153 ·
This reply has info, links and specification / features comparison between the Porsche OEM camera and the Fitcamx. The Porsche system has more features, but is huge / ugly / expensive. I find it amazing that Porsche will design such an exceptional vehicle, then offer such a visually unappealing camera solution.

This reply has info on the Blackview camera system. It has continuous monitoring while parked until is sucks the optional battery pack dry, then sucks the main vehicle battery down to a predetermined threshold that is supposed to permit the vehicle to start. IMO, sucking the main battery down while parked is waaay too scary for me to consider that system.

Again, please share the camera solution that is selected.
 
#161 ·
As was stated in this reply it is very common to use ferrite beads as part of resolving emission issues on a product.

The emissions are addressed by a layered approach, with the greatest flexibility at the initial design stages, when components are selected, frequently working with the component manufacturers, also frequently using a reference design kit obtained from the manufacturer as a starting point.

The design then progresses, including factors like selection of the circuit board size, quantity of circuit board layers, product layout and inclusion of optional population components for selective features and for addressing things like this conducted emission issue.

They might have permitted additional filter capacitors or inductors to change / control emissions, or not. They might have already maxed out their initial design emission components.

They might have determined from their testing that the device was good, but for some reason when installed on the Macan it is problematic.

Given the Fitcamx fully released product stage there is much less flexibility for design changes, so solutions like ferrite beads are commonly used to attain that last bit of emission control.

Even though the manufacturer hasn't chimed in yet, the low-cost / easy ferrite bead fix has been 100% successful on resolving the conducted emission issues. Maybe they will chime in, maybe they won't.

"my search continues" - what is the status of that vehicle camera selection search?
 
#163 ·
Hey does anyone have links or part numbers for the metal clips that hold the dome light? I bent mine and wanted to install new ones instead of bending them back in place. If anyone has replaced them, please help me out, thanks!